8 Steps to Install a Vigilant Wine Cabinet

Vigilant was offered the opportunity to design and construct wine cabinets for a high-end restaurant in Portsmouth, NH. Working with the project architects, we identified the client’s needs based upon the available space, storage capacity, cooling application and material requirements. After several design revisions, we created the perfect solution for their needs.
Upon client approval of the design, the Vigilant build team constructed the cabinets in eight sections and prepared them for shipment to the project site where the installation team took over. The team followed a step-by-step installation protocol to ensure that the cabinets perform properly for years to come.
Step One: We reviewed the Vigilant-supplied shop drawings and mechanicals with the dimensions and electrical connections of the actual space to make sure that everything corresponded accurately.
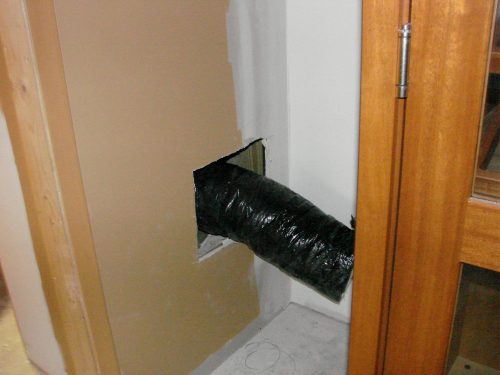
Step Two: We marked all the stud locations, verified the locations of all the electrical outlets and ducting locations for the cooling system to avoid any mechanical problems after the cabinets were set in place. For this project, the client opted for a through-wall ducted system at one end of the installation, so we confirmed that the appropriate venting holes in the wall were there and located accurately. Some trimming of the drywall was required to get the ducting to fit.
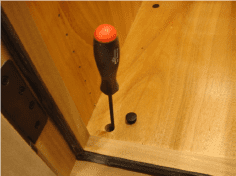
Step Three: Using a laser and level we checked for any height discrepancies on the floor. We then marked the high spots on the floor and w a line across the wall to mark where all the cabinets would line up evenly and be free of any flooring irregularities. Since the flooring was a little uneven we used the adjustable leveling feet that Vigilant places on the bottom of all our wine cabinets to bring each cabinet to the level line.
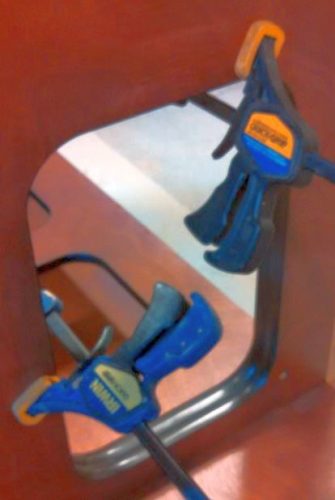
Step Four: We then applied caulking around the openings on the side of the first cabinet and carefully placed the second cabinet next to it. Before connecting the cabinets, we used the leveling feet to make sure the second cabinet was perfectly level and parallel to the first cabinet – checking that they aligned side to side and front to back. With the use of some clamps, we made some adjustments to the leveling feet on both cabinets and once we found the perfect fit, we used the supplied connector bolts to secure the cabinets to one another using the pre-drilled connector holes in the cabinets.
Step Five: We continued the installation by carefully adding the remaining cabinets in a similar fashion until they were all connected and secured to one another. The last cabinet was difficult to get into place due to the tight corner but with careful use of leverage and force we got it into place. We double checked to ensure all the cabinets were plumb and level, adjusting the leveling legs where necessary. We snug-fit all four legs of each cabinet to the floor to ensure stability once loaded with hundreds of pounds of wine.
Step Six: We used the supplied large “L” brackets at the top of the cabinets to attach them to the wall at the marked stud locations.
Step Seven: We wired the lighting and fished the ducting from the end of the cabinet though the wall to the system. The cooling system in this application was placed in an adjacent room making it easy for the air to flow to and from the cabinet with the hot air exhausting away from the space.
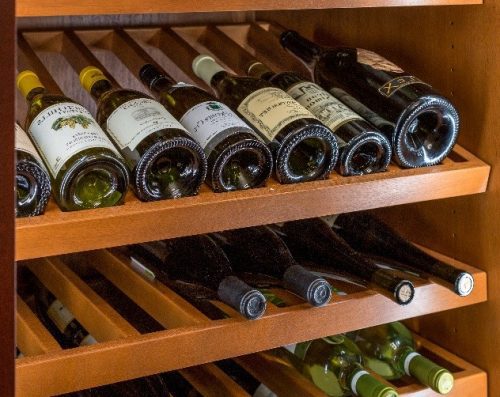
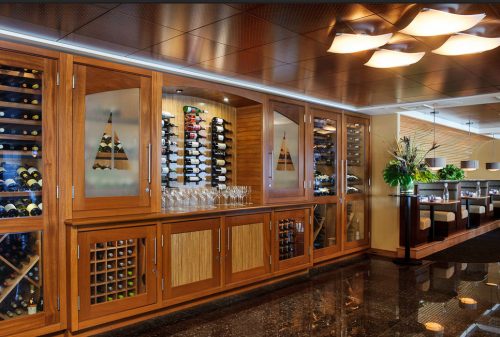
Step Eight: We installed the slotted wine bottle shelves using the supplied shelf pins and installed the diamonds bins and cubbies. In doing so, we consulted with the bar manager to make sure all the shelves were located where she wanted them. This allowed the restaurant to organize the wine bottles in a functional way for their staff. The shelving for these cabinets accommodated 2,000 bottles of wine allowing the restaurant to offer one of the largest wine selections in the area.
After several hours of work the installation was complete. The restaurant was very pleased with the end result and they have been running smoothly for several years now. To learn more about Vigilant refrigerated wine cabinets or installation procedures, visit us online.
SHARE:
